How iron a shirt? The Webmenshirts tutorial
First, here is the summary of the main steps to rethread your shirt, detailed at the end of the article:

The shirt, elegant fashion accessory by excellence and must be ironed perfectly. However, it turns out that the shirt is not always easy to iron correctly. That's why we propose to give you here some tips that will allow you to become a true professional ironing shirt!
Choose the right shirt
There are all kinds of shirts. Some are easier to iron than others. Two main criteria will allow you to define the level of difficulty of ironing.
First, the fabric. The finer the fabric used to shape your shirt, the easier it will be. The thicker the fabric, the harder it will be to wrinkle and therefore iron. For example, a shirt built in a simple twisted fabric will always be easier and faster to iron than a shirt built in a double or triple twisted fabric. In other hand, the simple shirt twisted to the finer fabric, will wear faster than the double twisted shirt and even more than a triple plied shirt whose fabric will be almost indestructible.
The second criterion that will allow you to define if, yes or no, a shirt will be easy to iron, is the cut of the latter. Indeed, the cut of a shirt can cause ironing difficulties. The most obvious case is obviously that of the plastron shirt. The plastron is composed of an extra thickness of pleated fabric, it will force you to a long and meticulous ironing. In the same way, a musketeer shirt usually has a series of folds at the wrists. It will therefore be necessary to take care of ironing the folded part, slightly puffed sleeves, and this operation is sometimes delicate. Also check the type of fold that is in the back of your shirt. Some shirts do not have one - they will obviously be easier to iron - others have two laterals and others finally, only one following the backbone, which can be a hollow fold, particularly complex to iron! In general, the more complex the cut, the more folds and creases are, the more your shirt will be difficult and long to iron.
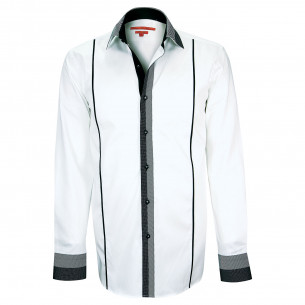
It is therefore important to make the right choice when you buy, especially if you are wearing regular or everyday shirts to get to work. In this case, and to make sure you do not make a mistake, you can go to the "Easy Ironing" stamped shirts.
Easy care shirt
At Webmenshirts.com, we thought of men who have to wear a shirt every day at work. To simplify their task, we have developed a wide range of easy ironing shirts. What is it about ? Shirts stamped "easy ironing" are at the same time simple to maintain and fast ironing. This represents a significant time saving. The easy ironing shirts have simple cuts and no need for extra folds or other aesthetic pleats. In addition, our easy ironing shirts are built in 100% cotton fabrics, sufficiently fine and treated to not wrinkle easily and to iron easily. In fact, you will need half as much time to iron an easy ironing shirt that you would need to iron a normal shirt.
Some general tips
To simplify ironing a shirt, there are some basic rules to follow before ironing itself.
Before washing
First of all, when you are about to wash your shirts, take care to unbutton them completely and remove the removable collar sleeves, if your shirts have them, before sliding them into the drum. . Try not to put too much in your washing machine, but, on the contrary, to leave your shirts a little space.
After washing
Once the washing is done, do not wait to take your shirts out of the machine. Make it immediately at the end of the wash cycle. Then take care of the wrinkles one by one by shaking them vigorously by not holding them shoulders. You will then need to replace the collar, the sleeves and cuffs of your shirts properly and finally, place them on hangers. For wire-type hangers, use rather wide hangers (with shoulders) so that your shirt takes shape as it dries. Once hanging from a hanger, button one button on two on the front of the shirt. Once again, this will allow it to dry while remaining in shape and with as few wrinkles as possible.
With or without dryer
Avoid putting your shirt in the dryer. Contrary to what we read here and there, the dryer can not be used as an iron! In any case, certainly not for a cotton shirt, which will come out maybe slightly wrinkled, but in any case similar to a shirt ironed!
Once your shirt dries, it must be ironed! And we are soon entering the heart of our subject. But before that, here are some more precisions!
What you may know before ironing a shirt
As beautiful as it is, your shirt will never be truly elegant if it is not impeccably ironed. Also, ironing is an essential step that you need to master.
To begin, a little clarification about the equipment you will need. The ironing board is obviously essential to a good ironing and we can not do without it. As for the iron, there is no need to invest in a steam plant, unless you have a very large amount of linen to iron. Indeed, you can totally settle for a simple model of iron. It will suffice to obtain a perfectly satisfactory result.
Some technical details
Let's start with some technical details that will certainly be useless to anyone who has already used an iron, but will be needed for beginners. Your iron logically has three essential functions: a knob that allows you to adjust the temperature, a button that allows you to send a cloud of steam at the sole of your iron and finally, a button that, on a pressure, spray a fine mist of water in front of your iron. For this to work, you must of course remember to fill the water tank with your iron. For this, it is better to use demineralized water than tap water. Indeed, the tap water is often limestone and will cause a fouling of your iron. The holes in the soleplate of your iron may then become clogged or clogged, causing various inconveniences: lowering of steam pressure, limescale particles on clothing, traces of friction ... Anyway, and for to avoid this kind of inconvenience, remember to maintain your iron and to descale it from time to time.
Correctly adjust the temperature of your iron
The question of setting the temperature is important. The shirts are usually built in a 100% cotton fabric, they can and must, for ease, to iron at full power, up to 200 degrees or more. That said, sometimes shirts are made from a blend of cotton and polyester. It will then lower the temperature of your iron between 110 and 150 degrees maximum, otherwise you damage your shirt by burning the fabric. If in doubt, you can refer to the label of your shirt to follow the maintenance instructions specified by the manufacturer and the material of your shirt. Logically, on this label which is sewn inside your shirt, you will find several symbols, including an iron. If three small dots are present in the body of this drawing, it means that the garment can be ironed at a temperature of 200 degrees with steam. If there are two points, you can go back to a temperature of 150 degrees with steam. If there is a point, you must set your iron to 100 degrees maximum and do not use steam. Finally, if the iron is empty or barred, it means that your clothes must not be ironed! If a doubt persists, adjust your iron to a temperature of 110 degrees and increase it until the folds begin to disappear without burning the fabric.
Good use of steam
Water, whether liquid or gaseous (vapor) relaxes the fibers of the fabric and thus simplify ironing. Steam is a precious ally in ironing your shirt. It makes it easier to wrinkle the fabric much easier than a simple hot iron. Without your soliciting, your iron will expel steam from its sole. But if this is not enough to quickly unwind your fabric, you can manually and by pressing the appropriate button, send extra steam. Do not hesitate to make good use of it. If the steam is not enough to smooth your shirt, then you can use the appropriate button to spray a fine mist of water on the crumpled parts of the fabric and iron iron on it. But never forget that your iron must stay in motion on the fabric. A too long downtime on one place would inevitably leave an indelible mark on your shirt.
The cleanliness of the shirt
Before ironing a shirt, make sure at a glance that all the tasks are properly washed. Indeed, getting a hot iron on a job is the best way to fix it forever. Be careful!
The golden rules of a good shirt iron
We are now entering the heart of our subject, ironing the shirt itself. If there is no formal way to use a shirt, there is a way to do it. And if you want to get irreproachable ironing, there is no alternative but to comply. It is therefore necessary to proceed in stages, while respecting the order of said steps. To help you in this process, you can refer to the tutorial video we made for this purpose.
Unzip the shirt completely.
You can not iron a buttoned shirt. The first step is to unbutton completely, wrists included.
Iron the collar
We will start by ironing the collar of his shirt. To do this, raise the collar and put it, inside facing you. Iron in the direction of the length, the tip of the iron always towards the interior, in order to avoid creases. Turn over your shirt to iron the collar again, but this time on the outside.
Fold the collar
Once your shirt collar ironed, you must fold it down and gently mark the fold with the hand. Do not use the iron for this operation.
Iron your shoulders
To do this, you must pass the shirt on the rounding of the ironing board. Iron the shoulder to the second buttonhole. Moisten then dry, then slide your shirt to repeat the operation on the other side.
Iron the sleeves
Put a first sleeve flat on the ironing board. Always start by ironing your wrists. Then, iron the sleeve from the seam of the shoulder to the wrist. Flip your sleeve and repeat the operation on its other side.
Iron the sides and the back
Start at the front. Place one of the pieces on the table, the neck arranged towards the small rounded part of the board. Extend the fabric with your hand so as to stretch it to avoid wrinkling and ironing your pan. Be sure to always iron in the same direction. Slide your shirt to iron the back. If the shirt is bent, you will have to iron it band by band, always in the direction of the length. Once your back is ironed, once again slip your shirt to iron the last pan. Take care to iron the fabric between the buttons with the tip of your iron, but never pass on the buttons, at the risk of burning them.
Put the shirt on a hanger
Once your shirt ironed, hang it without waiting for a hanger. Close the first two buttons then, just close the last one. In this way you will avoid creases.
Feel free to discover our wide range of Men's Shirts for all tastes and on any occasion by the French specialist Webmenshirts.